
This tutorial covers some techniques I find useful when working on a realtime model using color, specular, and normal maps. The result provides an handy base for further painting.
This is by no means the only way to do it. I do it quite differently now compared to when I wrote this back in 2005.
Obviously the balance between the maps highly depends on the way a particular engine handles them. This was written with 3DSMax and Doom3 in mind and the maps were genreated in 3DSMax and put together in Photoshop.
Shader authoring is behond the scope of this paper.
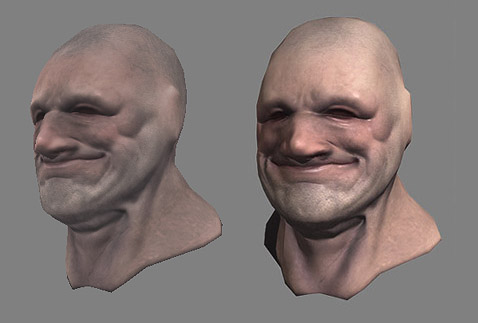
To start up I assume you have a realtime model ready (left) fitted to a dense source mesh (middle) and that your model is properly UVed and behaves decently when a normalmap is applied (right). You might want to check Mop's and Poop's tutorials since they both covers the subject in exhaustive manners.
No need for UVs on the highpoly model in our case.

At this point you most likely only have a normalmap at hand but the idea is to get the most out of the source mesh to get things faster when it comes to texture painting.

Trow some lights in your scene or use defaults to have the dense model lit from front-above and make a bake of that.

Now apply a shiny purple-ish material and make another bake. That will be a nice base for the specmap. You might need to use directive spotlights here in order to get more control over where light fall. (I dont really use that part anymore).

A specmap base rendered from a shiny material.
You might wonder why we are using blue here. I believe that it is a nice way to add a bit of contrast and depth in skintones, giving them a more subtle feel than if they were mereley lightened with a lighter shade of pink. Another reason is that we are surronded by blue from the sky that has to appear somewhere.
Next thing to do is to render a 'dirtmap' . To do so apply a blank material to the dense source model and setup a GI solution in your scene. Another technique for a similar result is to bake an Ambiant Occlusion pass using MetalRay, Xnormal or FAOGen.

The dense model ready for global illumnation.
Chose 'advanced settings/lighttracer' in the rendering menu and bake. Tthis is 3DSMax speech here but should translate easily to other applications.

The scene with the GI solution setup and the result as a baked map.
Time to setup lighting so that you can preview the output of the texturing job properly. You can use the handy 3point generator script available in the Blursripts package. Get it from the Blurbeta page!

Blur's 3point generator left at defaults
Hitting the 'Make Lights' buttons will throw 3 cone lights in your scene which will give you a nice and smooth light setup

3-point render of the game resolution model
You now have everything you need to get things done. Open the baked maps in your image editing application of choice.

normalmap, lightmap, dirtmap and specular base ready to go.
Create an empty document with 3 layer groups respectively named 'normal', 'diffuse' and 'spec'. Create a layer in each group and fill it with 50% grey for normal and diffuse and with black for spec.

Document setup
Clean up and edit the light bake and specbase bake so that they are nice and symetrical.

You might also want to strenghten the dirtmask to make it more effective. This can be done by many means. Here I duplicated the original layer 2 times, put both duplicates in multiply mode, blurred one of them, and then adjusted the duplicate's opacities to get the desired result. The amount of blur used on the top duplicate will determine how far the dirtmask spreads.

Touched-up dirtmask on the left, original on the right.
Put the bakes in the folders they belong to. For the diffuse folder, put the light bake on top of the strenghtened dirtmask in product mode and adjust opacity to you likings. On top of all that add a layer filled with a skintone color and put it to "color density +" mode. I like it for the nice color transition it gives while still keeping saturation quite up in the midtones.
A word of warning!
I believe one really have to be careful with that step. Dirtmasks are cool since they indicate where things collect dust (handy for both diffuse and spec maps) and that info can even be used as an ambiant occlusion map if the engine allow that. However, the use of a lightbake is more of hack. The point of it is to indicate where light most likely comes from. In that case I'm considering a top-down setup which happens most of the time. BUT! This has to be carefully balanced since the actual purpose of normalmaps is to describe the shape information that gamerez models lacks,and if you do things too harsh you might end up with a texturemap/normalmap lighting fight. Hence in theory there is NO NEED to bake lighting.
In the end it really comes down to the amount of control you want or need.

Base for diffuse map painting
Now we are ready to edit all those texture maps to make them render-friendly.
Duplicate the skintone layer and put the duplicate back to normal mode. Adjust it's opacity to get a nice toned-down skin effect.

Now we need to give that old man's skin color variations. If you look at your face you will notice that your cheeks are much redder that your forehead because of the difference in derm and muscle depth. You will also see that your jaw is slightly greyish because of growing beard. Touch up the texture to reflect that.

Red cheeks, yellow forehead and grey jaw!
I like to use the following trick for giving skintones a bit of extra depth : flatten the skintone folder, make a copy of that and blur it up slightly. Put the blurred layer in 'linear density +' mode and adjust its opacity. That will bleed colors together while still keeping details. It's really handy to give skintones a fresh and translucent feel.

Bloom effect put to good use
On a new layer paint some shadows over the deepest areas of the face. In that case that was the eyesockets and the corners of the mouth. That helps in giving more depth to the model.

Shadows layer in multiply mode.
You can now use variants on a flatenned copy to adjust colors and darkness.

Time for some dirtying. Here I have opened a few texture images and played with them to give the skin diffuse a much natural feel. I also needed to desaturate the 'clean' texture a bit since saturation was boosted too high because of the leather and rust overlays I have been using.

Dirt!
Check that up in the viewport. Save a TGA out of the layered document you've been workning on and slap that on the model.

Before and after dirtying.
Now on with the specular map. Make a flatten copy of the diffuse folder and add that copy on top of the specular folder. Put that to 'overlay' mode. That will translate some of the color and detail information from the diffuse map to the specular map and will help in putting everything together colorwise.

Left is the diffuse overlayed on top of the specular, right is the untouched specular base.
At this point I noticed that the highlights on the specular were way to bright. To fix that up I made another copy of the diffuse layer, used variants to turn it to a purple-ish tint and fiddled with layer modes and opacity to get a toned-down specular. You can also add a layer filled with purple on top of everything and play with the opacity to give the map a bit more consistency.

Blue tinted diffuse on the left and the resuling specular map.
Last step is to indicate the most speccy parts on the specular map. I darkened the spec even more and roughly painted highlights on a new layer. I did that over the wet parts (mouth, nose) and also where skin is really tense over the underlying bones (eyebrows).

The final specular map.
It's now time to check all that in a 3d render. I like to leave everything at defaults (no fancy falloff or shader) to force myself to get the most out of the maps breakdown.
Add a TGA version of the specular map from your working PSD to the 'specular color' material slot. Instance that to 'specular level' also.

Setting up the specular slots.
Save a TGA out of the normal map layer set, create a NormalBump map type in the Bump slot and put the TGA into that. Adjust the intensity spinner up to 100% instead of the original 30%.

Everything is ready. The preview window is looking good!
Render the scene. At this point I think I had the specular map withouth the extra highlights but you get the idea!

Almost there.
The result is still a bit oversaturated for an oldman look. A quick edit can easily fix that.

The fixed up diffuse map.
You can now add some more details. Here I added an overlay to fake a beard effect, duplicated that, moved it down of 1 pixel, inverted the overlay and searched for a suitable layer mode. This way I have both the beard holes and the bit of highlight they catch.

The fixed up diffuse map.
The final asset rendered in different lighting setups. You can see that even if we included a bit of shading on the diffuse the textured model still reacts well under extreme lighting conditions.

Done!
I would like to add some lines about asset portability. When working with a specific renderer you can expect your assets to behave quite diffrently when seen/rendered in another package or, furthermore, when ported to a realtime game engine.
To see how that goes I wanted to test the model in a Doom3-like environnement. You can grab that very handy Doom3 modelviewer by DerTon here (forum link) and here (rar file). It has been made with Doom3 in mind hence it is calibrated to behave just like it. The great thing is, while Doom3 needs special normalmaps to work correctly, that modelviewer reads classic normalmaps which is the type we have been working on here.

Derton's MD5 modelviewer.
A bit of setup is required. Create a new folder somewhere on you HD and put all your 3 TGAs in it. Rename the diffuse to 'whatever.tga', rename the normalmap to 'whatever_local.tga' and the spec to 'whatever_s.tga'. If you ever need an extra greyscale bump map for fine details you would need to call it 'whatever_h.tga'.
Export your lowpoly model as a ASE, put that in the folder you just created. Open the ASE in a textediting program and look for the line where the material path is indicated. Delete the absolute path that fetches the texture map from your disk and replace it by the name of the TGA only. In my case I had :
*BITMAP "D:\crea 3d\_tutoriels pior\tutoriel vieuxfou\doom3\tt.tga"
And I renamed that to :
*BITMAP "tt.tga"
Now in the scene tab hit 'load mesh' and open the ASE file. That should look freaky metallic/plasticy.

"OMG Doom3 makes everything plastic!"
The easy fix is to darken the specmap. ALOT. Just be sure there is still a bit of color information in it.

The specular map made suitable for Doom3.
That should do it.

Doom3 is owned.
You might now wonder how that asset we just made would behave in a classic game engine that won't support either normalmaps or specs. You would loose many shape information if you simply use the diffuse map we made.
To avoid that you can use a little hack. Follow the layer structure below and replace the maps with your own, the composite should give you a baked down render of the whole thing. The idea is to use the Y channel (normals pointing up) as a means to create light and shade. There are many ways to achieve this, just play with the idea.

A composited file faking a normalmapped look.
The result is not as punchy than a true nextgen asset but that might come in handy in some cases.
The faked normalmap compared to the real thing.
I hope it has been useful.
This is, again, just a personnal approach. It's up to you to pick up what works best for you.
Now get some work done!
Originally written by Pior Oberson Jul 7th 2005 Last edited Dec 23rd 2007